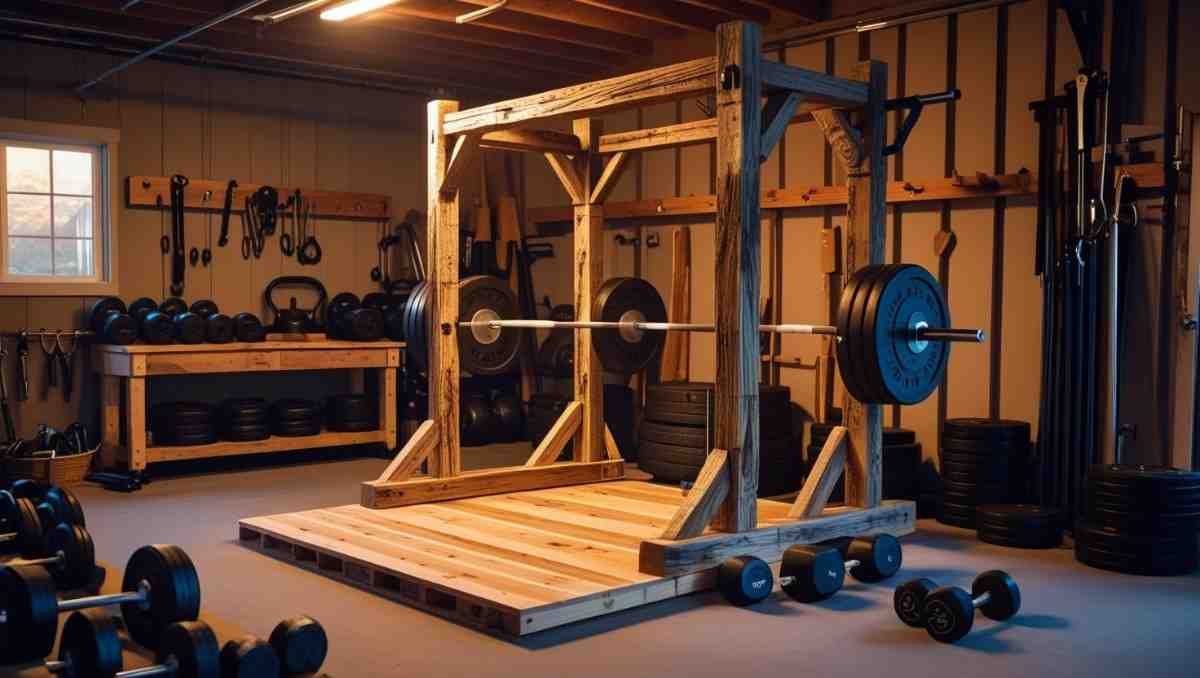
It’s a rainy weekend, your favorite gym is too packed, and all you want is to squat without waiting behind five sweaty dudes hogging the rack. Sound familiar? That’s how I ended up down the DIY rabbit hole and made my own squat rack. Yep, you read that right. A legit, sturdy, trust-your-life-on-it DIY squat rack right in my garage.
Let me just say it upfront—if I can do this, anyone with a drill, a bit of patience, and a slight obsession with squats can do it too. I’m gonna walk you through everything. No jargon. No confusing blueprints. Just real steps, real tools, and real talk.
Why Even Bother With a DIY Squat Rack?
Because sometimes, you just want to lift without dealing with crowds, gym fees, or weird grunts echoing off the walls. Making your own DIY squat rack gives you full control—height, width, style, vibe—you name it. Plus, there’s a weirdly satisfying joy in squatting under something you built with your own hands.
Also, let’s be real. Store-bought racks? They’re beasts. Too tall, too wide, or just not quite right for your weird garage corner. A custom-built DIY squat rack fits your space and your training style like a glove.
Step 1: Visualize It (Seriously, Don’t Skip This)
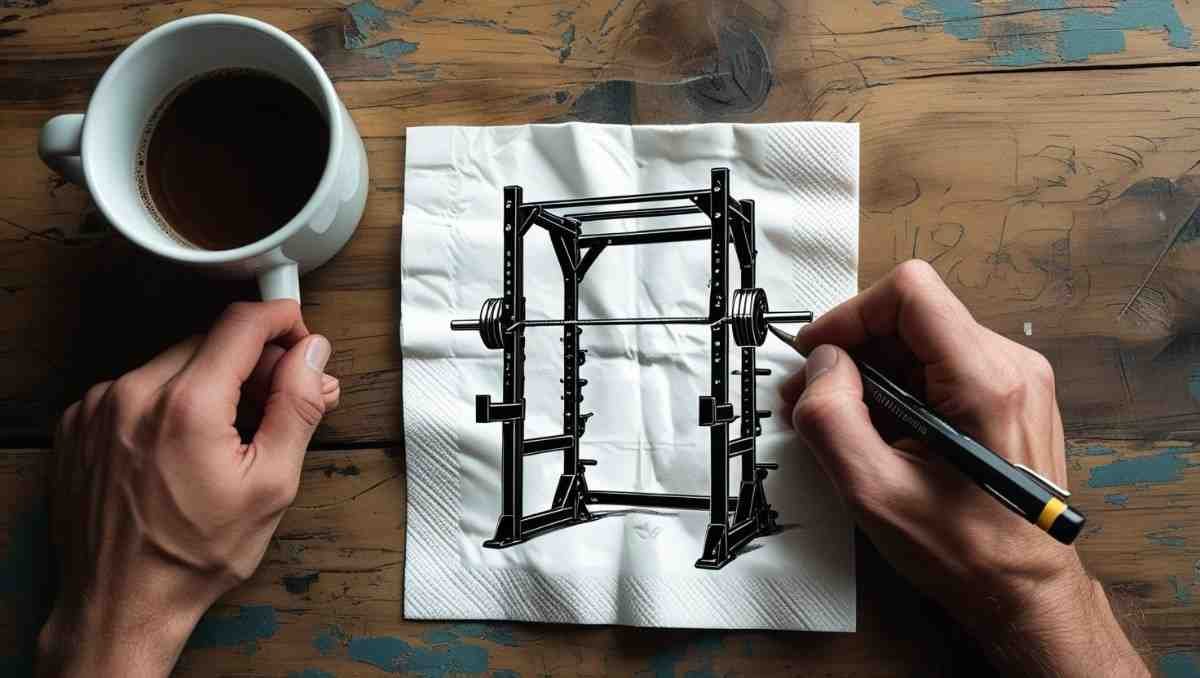
Before grabbing a hammer, just… picture it. Where’s it going? Wall-mounted or freestanding? Will you bench too? J-hooks or pipe sleeves? Start by asking yourself what kind of lifts you’re doing.
I sketched mine on a napkin at a diner—true story. That messy doodle actually helped more than any YouTube diagram. Start there.
Step 2: Tools You’ll Need (Spoiler: It’s Not a Workshop Worth of Gear)
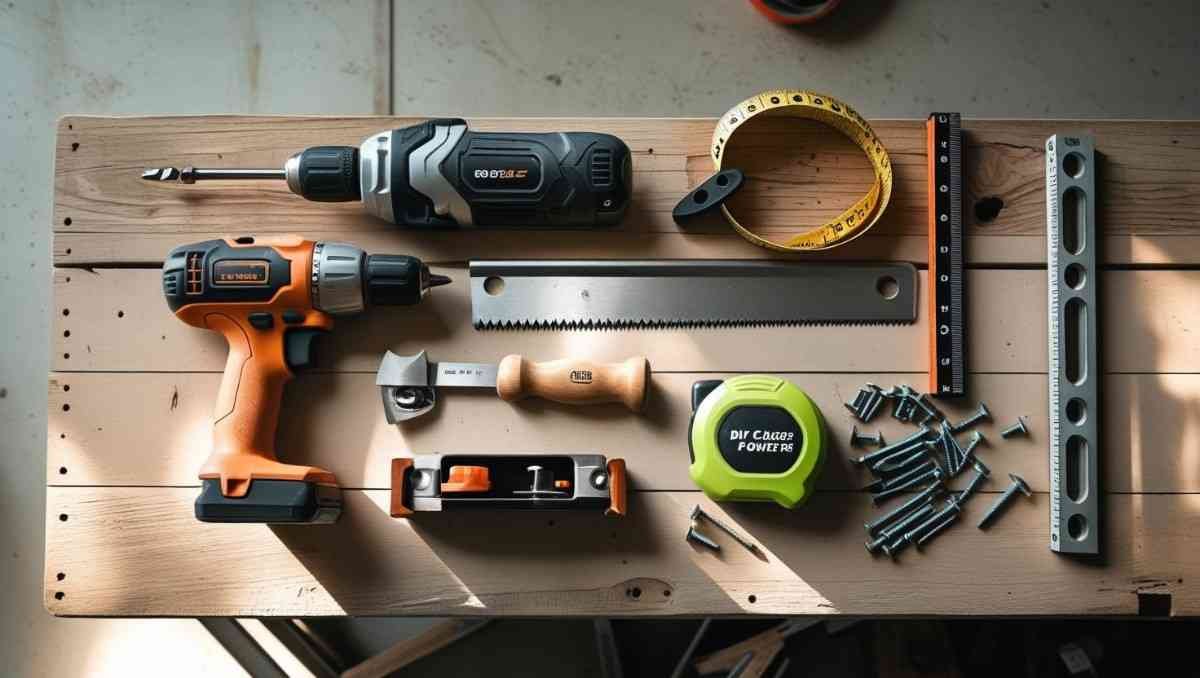
Here’s the basic list I used:
- Power drill
- Circular saw or handsaw
- Measuring tape
- Level (don’t trust your eyeballs)
- Wood screws or lag bolts
- Clamps (if you’ve got ‘em)
I used a power drill so much, I swear it became an extension of my arm.
Step 3: Choosing the Right Material

This was the step I almost overthought into oblivion. I considered steel, PVC, plywood, you name it. Ended up going with good ol’ 4×4 wooden posts. Strong, reliable, doesn’t scream industrial warehouse.
If you’re lifting heavy, wood works—just make sure it’s treated, clean, and straight. Warped lumber is a nightmare.
Step 4: Cut Everything to Size
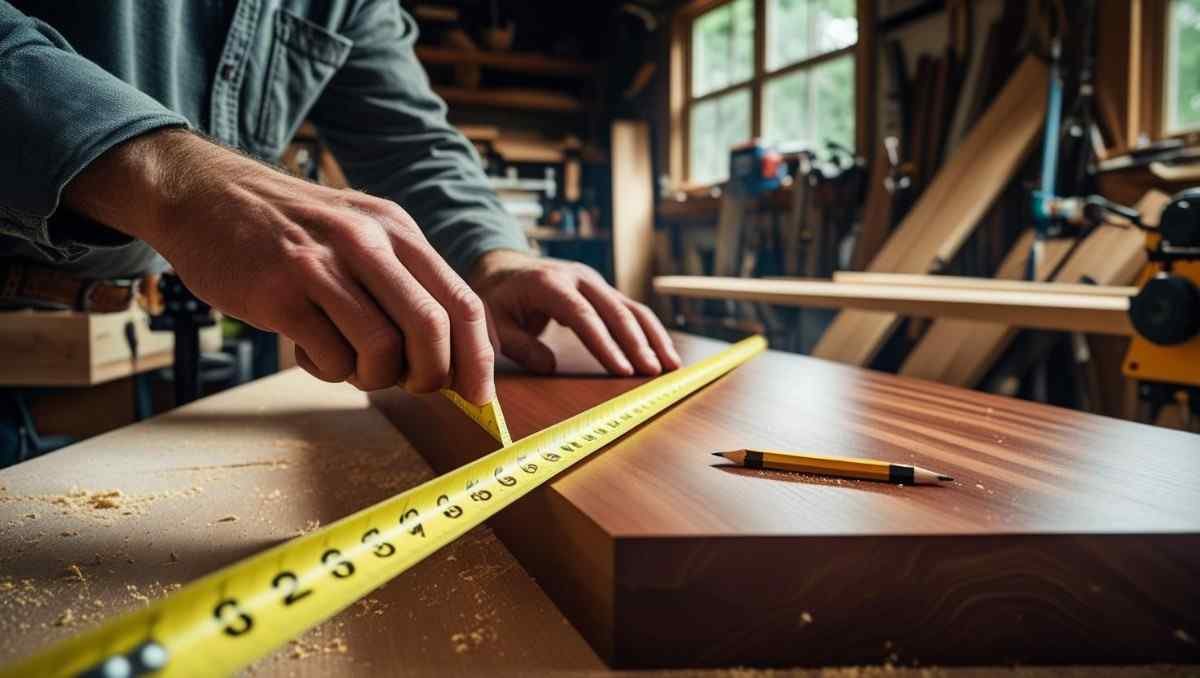
This is where things got real. Measure twice, cut once (and still mess it up once).
My dimensions:
- Uprights: 72 inches (or taller if you’re over 6 feet)
- Base: 48 inches wide
- Crossbeam: 42 inches wide (between uprights)
These gave me enough space to squat without hitting anything or feeling claustrophobic.
Step 5: Assembly Time (Aka, Where You Question Life Choices)
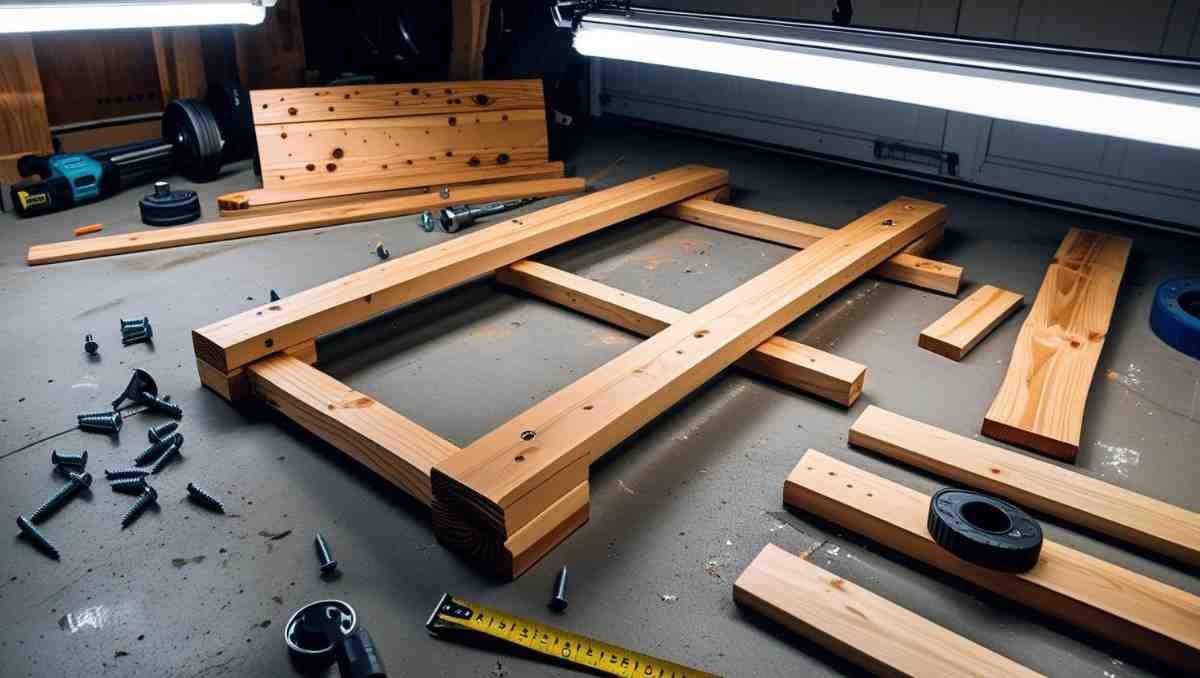
Layout your base and start attaching your uprights. I drilled pilot holes first—less splitting, way cleaner.
Make sure everything is square. I didn’t the first time. Racked a barbell, stepped back, and it looked like the Leaning Tower of Pisa. Redid it. Lesson learned.
Add crossbeams for extra support. Think of them like the seatbelt of your DIY squat rack.
Step 6: J-Hooks or DIY Bar Holders
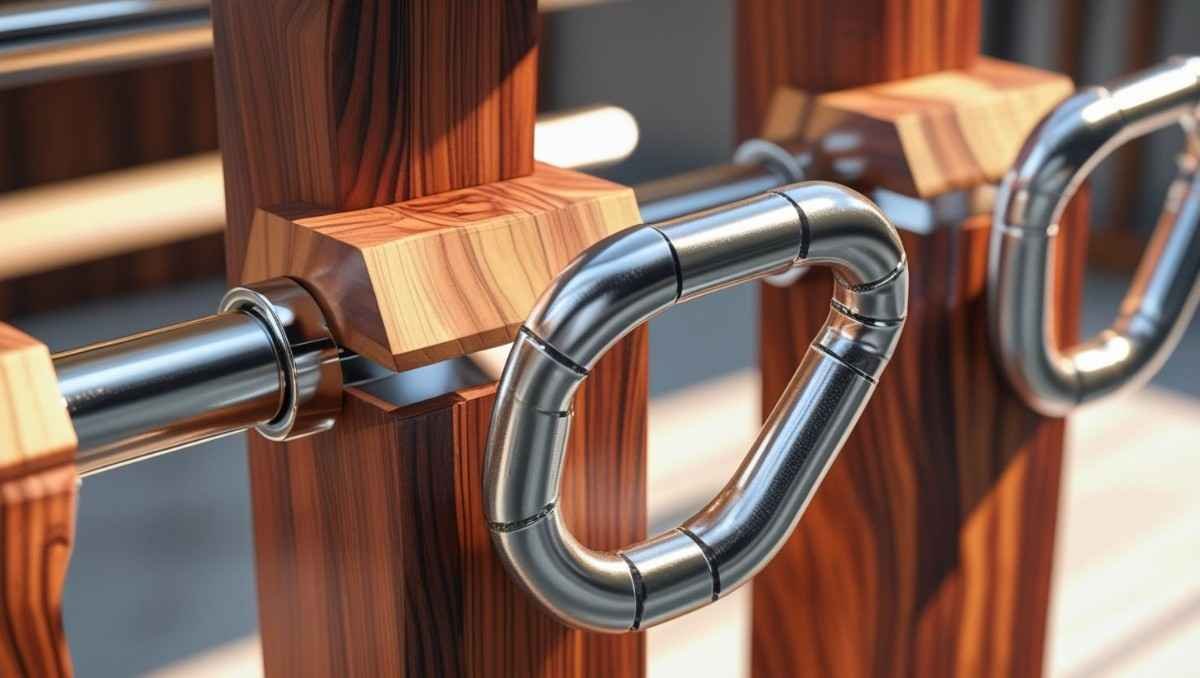
Here’s where creativity shines. You can use:
- Steel pipe pieces
- Pegboard hooks
- U-bolts and a wood block combo
I went with a DIY wood notch system. Cut out little “U” shapes on a block of wood and mounted them onto the uprights. They held my bar like a champ.
Step 7: Test It (With a Broomstick First!)
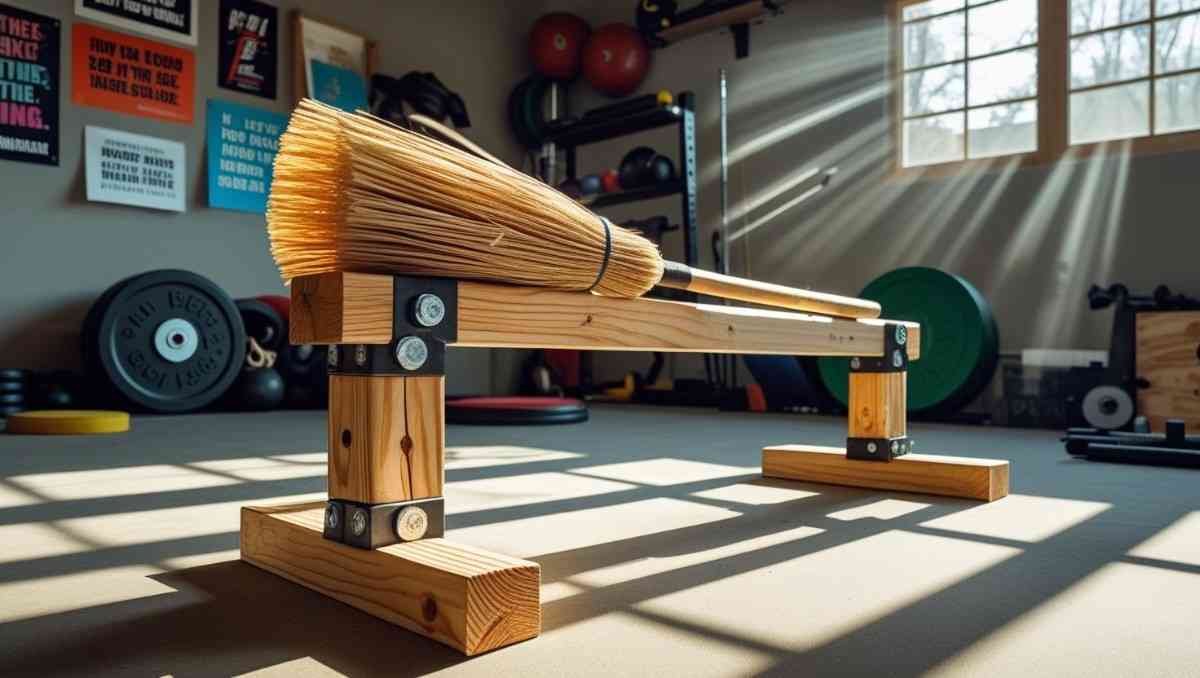
Don’t be a hero. Throw a broomstick on there, pretend it’s 300 lbs, and give it a test rack and unrack. Jump around a little. Shake it. Make sure it doesn’t wobble or shift.
Once you’re confident, go ahead and try it with an empty bar. Then plates. Then… glory.
Step 8: Customize It for Your Style
Add some padding where the bar hits. Paint it. Bolt it to the floor. Add pull-up bars. Heck, I slapped on a sticker that says “SQUAT OR DIE.” It’s yours—make it feel like part of your space.
Some folks go overboard with features. Just start simple. You can always upgrade later.
Step 9: Maintenance & Safety Check
Every few weeks, check screws, tighten bolts, look for wear or shifting. Your DIY squat rack is tough, but it’s not magic. Treat it right and it’ll stay safe.
Also—don’t skip the warm-ups. DIY rack or not, joints don’t care.
Can You Move It Later?
Short answer? Yep. I built mine so I could disassemble the base and uprights separately. It’s bulky, but movable.
If you’re renting or just someone who likes to rearrange garages every season, keep this in mind.
Do you know how DIY Squat Rack helps in to propose? See Here
Final Thoughts (And a Bit of Bragging)
Building a DIY squat rack isn’t just about saving space. Or about not having to share a bench with that dude who smells like sadness and pre-workout.
It’s about building something real. Something that lets you lift, grow, and yes, flex just a little when people ask, “Where’d you get that rack?”
You’ll say, “I made it.” And that, my friend, is unbeatable.
Want to see more DIY solutions?
Check these: